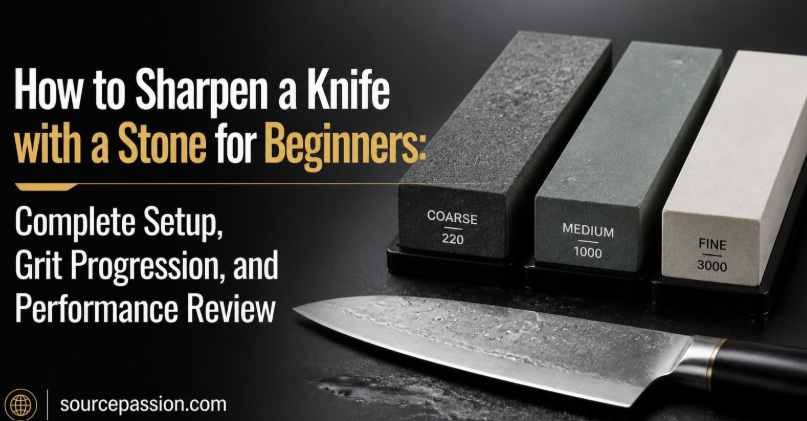
How to Sharpen a Knife with a Stone for Beginners: Complete Setup, Grit Progression, and Performance Review
A dull kitchen knife is frustrating, inefficient, and potentially less safe because it often requires more force to make a cut. Learning how to sharpen a knife with a stone gives you much more control over the blade than many quick sharpening methods.
The good news is that you do not need years of experience or an expensive collection of sharpening equipment. With a suitable whetstone, a stable work surface, the correct sharpening angle, and a little patience, a beginner can produce a genuinely sharp edge.
Professional knife manufacturers also recognize the advantages of stone sharpening. ZWILLING describes sharpening on a stone as a technique used by culinary professionals because it provides considerable control and precision over the edge.
This guide explains the complete process, including whetstone setup, knife angle, grit progression, burr formation, pressure control, deburring, edge testing, common mistakes, and long-term maintenance.
Buy now in AMAZON
Quick Answer: How Do You Sharpen a Knife with a Stone?
For a typical kitchen knife:
- Choose an appropriate whetstone, such as 800–1000 grit for routine sharpening.
- Prepare the stone according to the manufacturer’s instructions.
- Place it securely on a nonslip surface.
- Identify the knife’s recommended edge angle.
- Hold the blade consistently against the stone.
- Sharpen one section of the edge at a time.
- Work until a small burr develops along the opposite side.
- Repeat on the other side.
- Progress to a finer stone if necessary.
- Reduce pressure and carefully remove the remaining burr.
- Rinse and dry the knife.
- Test the edge with a safe cutting test.
The most important principle is consistency rather than speed. A beginner who maintains a reasonably consistent angle and properly removes the burr will generally get better results than someone who uses expensive stones but changes angles and pressure constantly.
What Is a Sharpening Stone?
A sharpening stone, commonly called a whetstone, is an abrasive surface used to remove a controlled amount of metal from a knife edge.
As the blade moves across the abrasive, tiny particles of steel are removed. By controlling where that material is removed, you can recreate the two bevels that meet at the cutting edge.
Sharpening is therefore different from simply “polishing” a knife.
Sharpening vs. Honing
These terms are often confused.
Sharpening removes material to create a new or restored cutting edge.
Honing generally refers to maintaining or refining an existing edge. A honing steel, for example, can help realign an edge but is not equivalent to grinding a significantly worn edge back into shape.
A whetstone can perform actual sharpening because its abrasive surface removes steel.
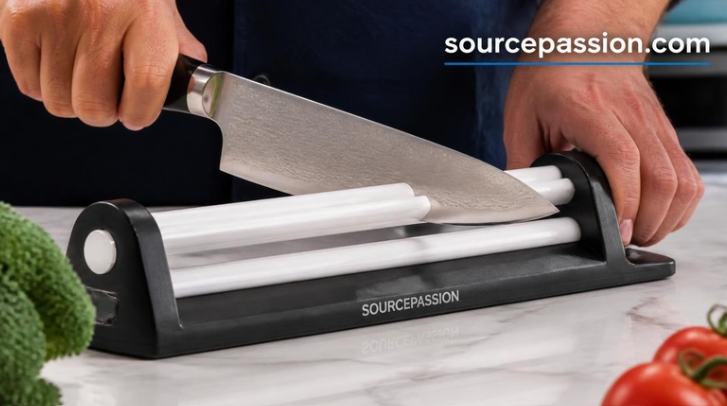
Why Use a Whetstone Instead of a Pull-Through Sharpener?
Buy now in AMAZON
There is no single sharpening method that is perfect for every person or every knife.
A whetstone has several important advantages:
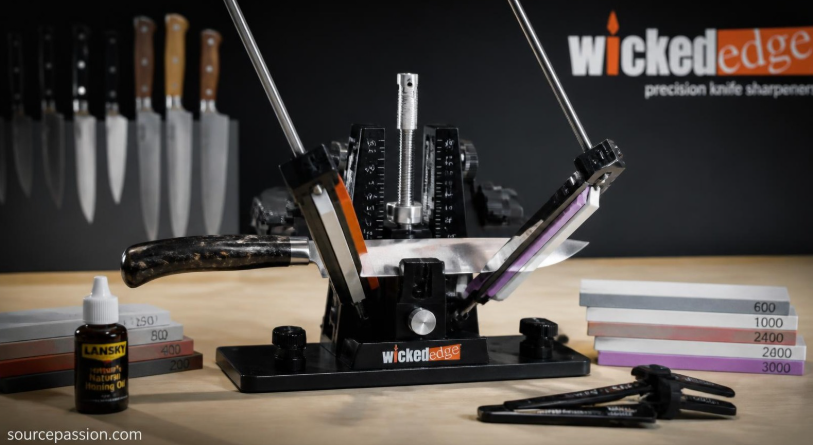
- Excellent control over the sharpening angle
- Ability to choose different abrasive grits
- Ability to repair moderately damaged edges
- Ability to create different edge finishes
- Relatively little metal removal when used correctly
- Useful for maintaining many types of kitchen knives
The disadvantage is the learning curve.
A pull-through sharpener is easier to operate because the angle is usually built into the tool. A whetstone requires the user to control the blade angle manually.
Whetstone vs. Other Sharpening Methods
| Method | Control | Learning Curve | Best Use |
|---|---|---|---|
| Whetstone | Very high | Moderate | Precision sharpening |
| Honing steel | Moderate | Low | Edge maintenance |
| Pull-through sharpener | Low–moderate | Very low | Quick sharpening |
| Electric sharpener | Moderate | Low | Convenience |
| Professional sharpening | Very high | None for user | Damaged or valuable knives |
For someone who wants to understand and control the actual geometry of a knife edge, a whetstone is an excellent long-term option.
What You Need to Sharpen a Knife with a Stone
You do not need a complicated setup.
Essential Equipment
1. Sharpening Stone
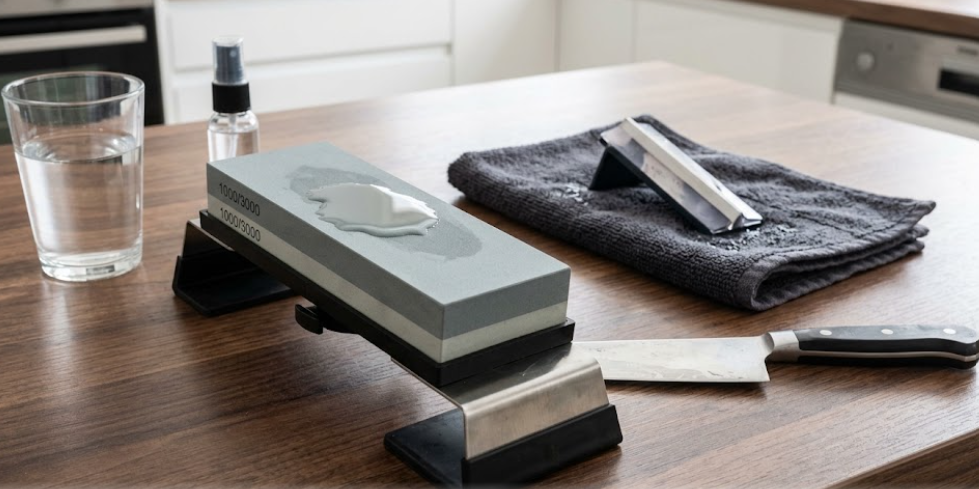
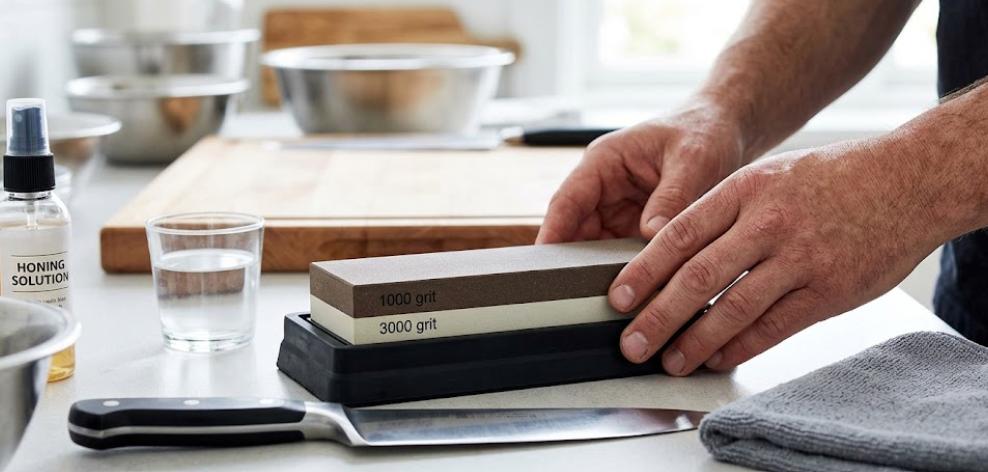
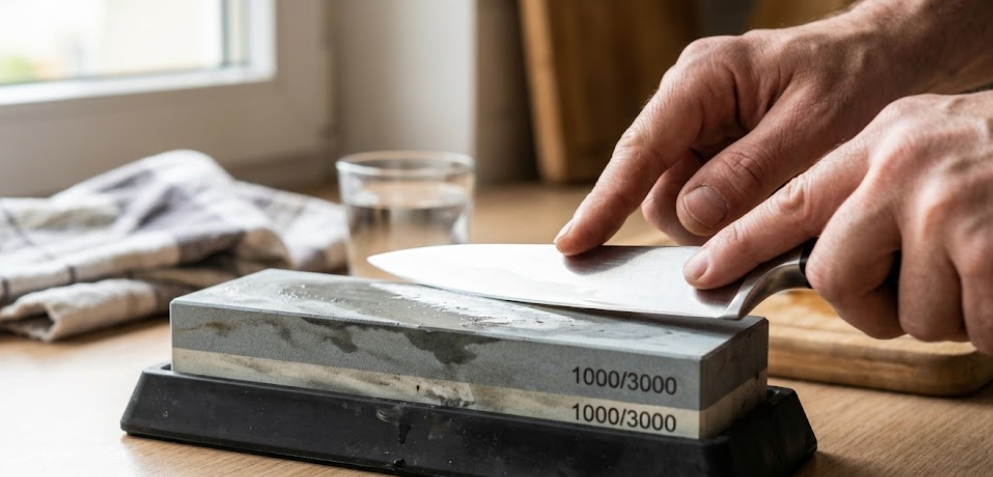
For beginners, a combination stone is convenient.
A 1000/3000 or 1000/4000 combination stone can cover routine sharpening and refinement.
If the knife is extremely dull or damaged, a coarser stone may be necessary.
2. Stable Base
The stone must not slide while you are sharpening.
Use:
- A purpose-built stone holder
- A nonslip rubber base
- A stable damp towel underneath the stone
Never try to sharpen with a stone that moves unpredictably across the counter.
3. Water or Lubricant
Different stones have different requirements.
Some water stones need soaking. Others are splash-and-go stones. Oil stones use a different lubricant.
Always follow the instructions supplied with the particular stone.
For example, WÜSTHOF’s instructions for its whetstones recommend soaking before use and keeping the stone wet during sharpening.
4. Clean Cloth
Keep a cloth nearby to wipe water and metal particles from the work area.
5. Optional: Angle Guide
An angle guide can help beginners develop consistency.
However, it is not essential. With practice, you can learn to maintain the angle by feel.
Understanding Whetstone Grit
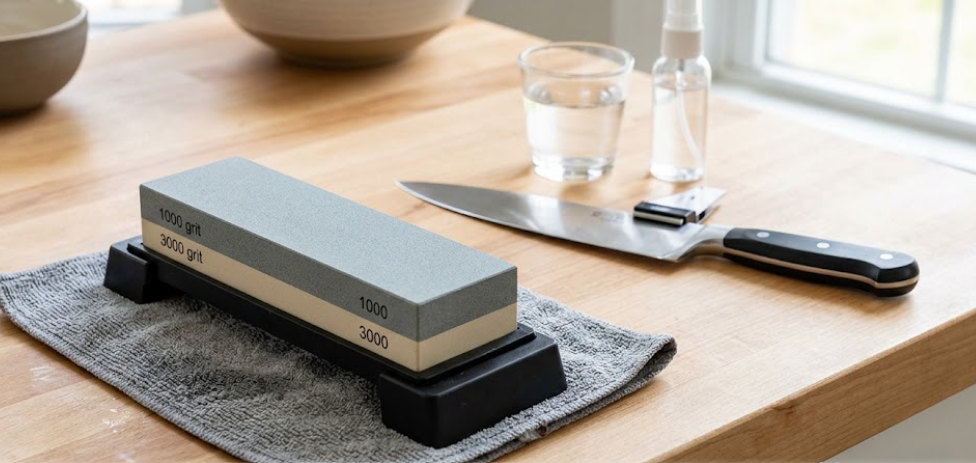
Grit is one of the most important concepts in knife sharpening.
Generally:
Lower grit = coarser abrasive = more aggressive material removal
Higher grit = finer abrasive = more refined finish
However, grit numbers are not perfectly interchangeable between every abrasive standard or manufacturer. Therefore, treat grit ranges as practical categories rather than universal measurements.
ZWILLING, for example, lists sharpening stones ranging from approximately 250 to 10,000 grit, with coarse stones intended for heavily worn edges and finer stones used for honing or polishing.
Beginner Grit Progression
| Grit | Primary Purpose | Typical Situation |
|---|---|---|
| 200–400 | Heavy stock removal | Chips, major damage, reprofiling |
| 600–800 | Coarse sharpening | Very dull knives |
| 800–1200 | General sharpening | Best beginner range |
| 2000–3000 | Refinement | Smoother, cleaner edge |
| 4000–6000 | Fine finishing | Polished kitchen edge |
| 8000+ | Very fine polishing | Specialized finishing |
Do Beginners Need 10,000 Grit?
Usually, no.
A very high-grit stone can produce an attractive polished edge, but polishing is not automatically the same thing as improved real-world cutting performance.
For ordinary kitchen use, a 1000-grit stone followed by approximately 3000–5000 grit is already more than sufficient for many knives.
ZWILLING specifically identifies around 3000 grit as a fine option for producing a very sharp result.
The Best Beginner Sharpening Setup
If you are buying equipment for the first time, keep it simple.
Recommended starter setup
Stone: 800–1000 grit
Optional finishing stone: 3000–4000 grit
Base: Nonslip holder
Angle: Follow the knife manufacturer’s recommendation
Maintenance: Regular light sharpening rather than repeatedly waiting until the knife is extremely dull
This setup covers the majority of ordinary kitchen sharpening jobs.
How to Find the Correct Knife Sharpening Angle
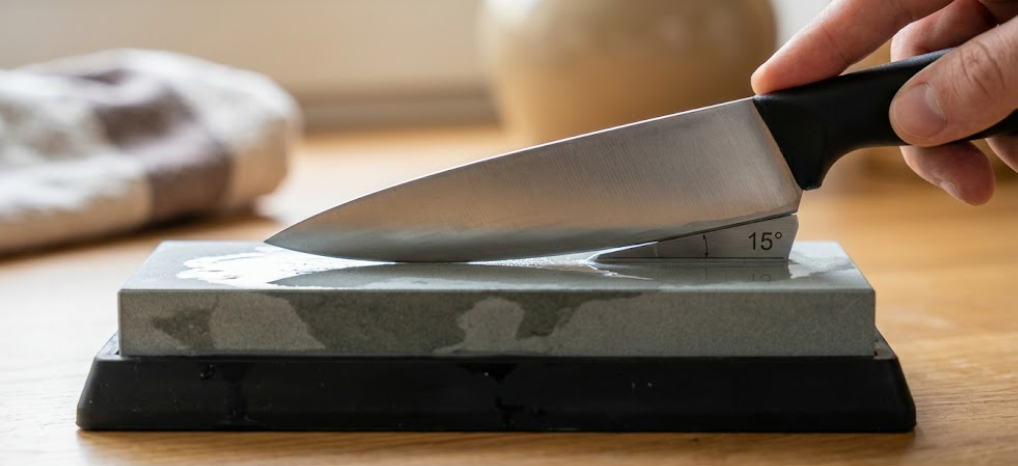
Angle is arguably the most important technical part of sharpening.
The per-side angle is the angle between one bevel of the blade and the stone.
For example:
- 15° per side = approximately 30° inclusive
- 20° per side = approximately 40° inclusive
Do not confuse the per-side angle with the total included edge angle.
Typical Kitchen Knife Angles
There is no universal angle for every knife.
Manufacturers may specify different angles according to blade design and intended use.
For example, WÜSTHOF currently recommends approximately 14° per side for its standard blades and approximately 10° per side for certain Asian-style blades such as Santokus and Nakiris.
ZWILLING describes a broader sharpening range of approximately 10–20° depending on the knife.
Practical Beginner Rule
If the manufacturer provides an angle recommendation, use it.
If you cannot find one, approximately 15° per side is a reasonable starting point for many kitchen knives, but the correct choice depends on the blade’s geometry, steel, thickness, and intended use.
A thinner, more acute edge can cut very efficiently, but a more obtuse edge can provide greater durability.
Research by metallurgist Larrin Thomas of Knife Steel Nerds found that edge angle can have a very substantial effect on cutting performance and edge retention. In controlled CATRA testing, changing the edge angle produced a much larger effect than several other variables tested in the same experiment.
A Simple Trick for Learning the Correct Angle
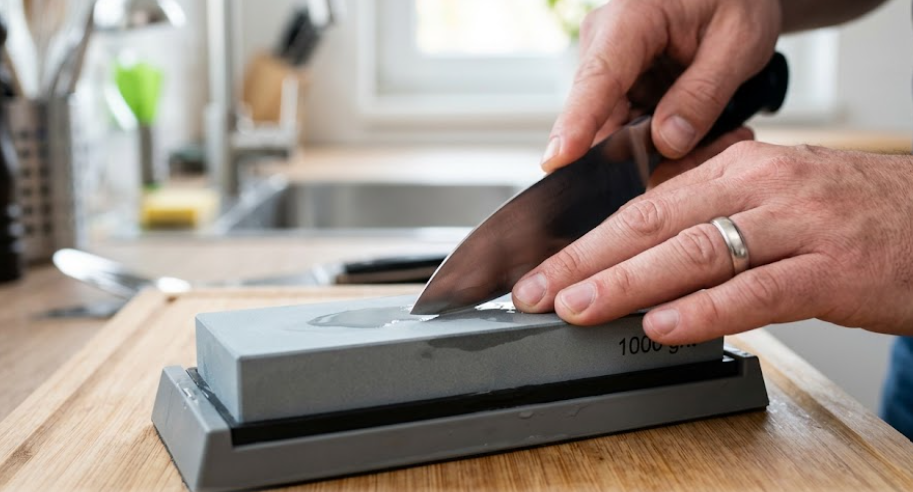
If you are struggling to visualize 15° or 20°, use a visual reference.
For a rough starting point:
- 10° is very low
- 15° is a moderately acute kitchen edge
- 20° is more robust
- 25° and above becomes increasingly durable but less acute
You can also use an angle guide during your first few sharpening sessions.
Another useful beginner technique is to color the existing bevel with a washable marker.
Make a few light sharpening strokes.
Then inspect the bevel.
If the marker is being removed evenly across the existing bevel, your angle is close to the current geometry.
This technique is particularly useful because it teaches your hands what the correct position feels like.
Step-by-Step: How to Sharpen a Knife with a Stone
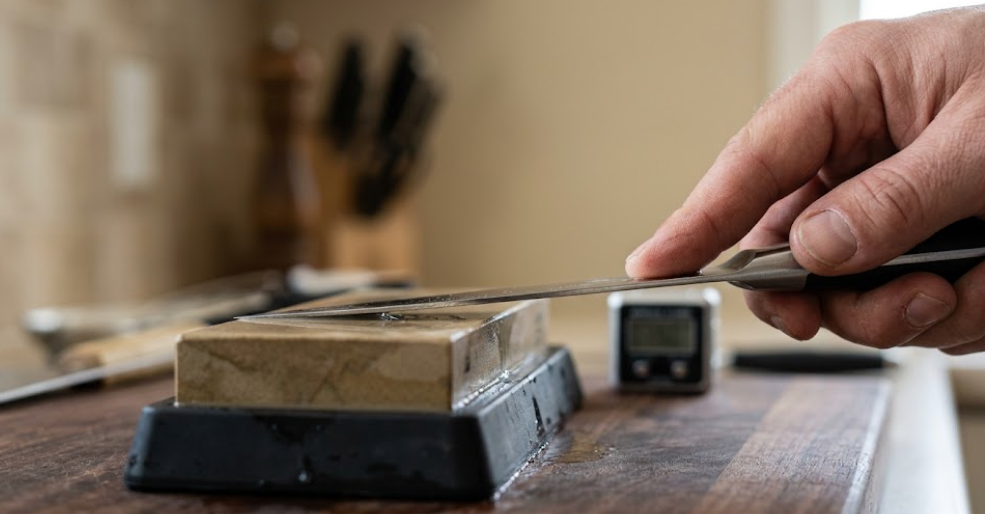
Step 1: Prepare the Stone
First determine whether your stone needs soaking.
Some traditional water stones require several minutes of immersion, while others are designed to be used after simply wetting the surface.
Do not automatically soak every stone.
Follow its instructions.
Place it on a stable, nonslip surface.
The stone should not move during sharpening.
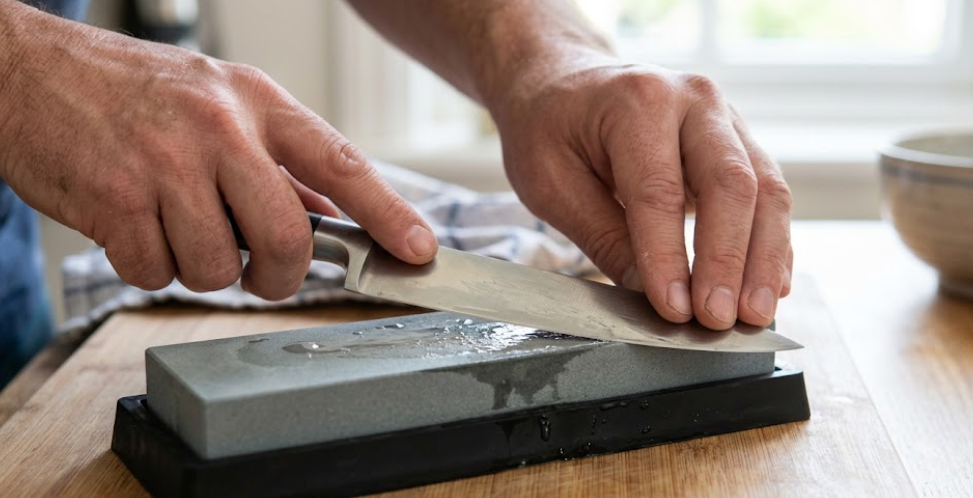
Step 2: Position the Knife
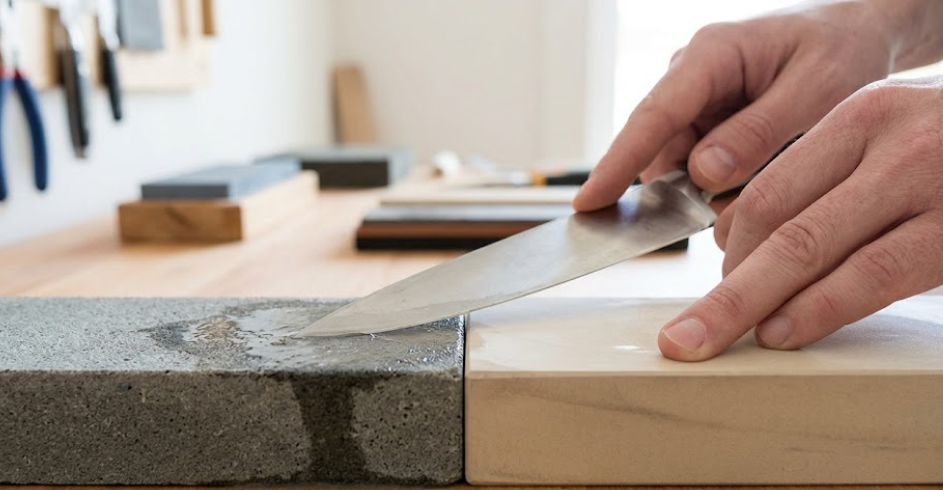
Hold the knife securely by the handle.
Place the heel or another section of the blade on the stone.
Raise the spine until the blade reaches your chosen sharpening angle.
Do not place your fingers directly in front of the cutting edge.
Your free hand can apply controlled pressure to the flat of the blade, but it should remain safely away from the edge.
ZWILLING’s instructions similarly emphasize keeping fingers away from the cutting edge while sharpening.
Step 3: Start with the Coarse Side
If the knife is significantly dull, begin with the coarser stone.
Move the blade across the stone in controlled strokes.
You can use a motion that travels from the heel toward the tip while maintaining the same angle.
The exact motion is less important than three things:
- Consistent angle
- Consistent coverage
- Controlled pressure
Do not rush.
Step 4: Sharpen the Entire Edge
A knife blade is not perfectly straight.
It normally has:
- Heel
- Middle section
- Tip
The curved tip requires special attention.
If you use exactly the same wrist position throughout the stroke, you may accidentally lift the edge away from the stone near the tip.
Instead, gradually follow the curvature of the blade.
Imagine that you are trying to keep the entire bevel in contact with the stone.
Step 5: Look for a Burr
The burr is one of the most useful indicators that you have reached the apex.
As you sharpen one side, the abrasive eventually reaches the very edge and pushes or bends a tiny amount of material toward the opposite side.
You may be able to feel this fine wire-like edge by carefully checking from the side opposite the stone.
Do not run your finger along the cutting edge.
Instead, use a controlled fingertip check from the side of the blade or use visual inspection.
Science of Sharp explains that burr formation occurs at the apex as abrasive particles interact with the thin metal near the edge. It also notes that burr behavior is more complicated than simply “creating a burr and removing it.”
Important:
Do not keep grinding unnecessarily after you have established the apex.
Once the burr is consistently formed along the relevant section, you can move to the opposite side.
Step 6: Sharpen the Other Side
Turn the knife over.
Repeat the process at the same angle.
The objective is to create a corresponding bevel and move the apex back toward the center.
Beginners often make one side sharper than the other because they unconsciously change their angle or pressure.
Consistency matters more than counting exactly the same number of strokes.
Step 7: Reduce the Pressure
Once the edge is established, gradually reduce pressure.
Heavy pressure is useful for removing metal quickly on a coarse stone.
It is usually unnecessary during the final refinement stages.
Excessive pressure can make it harder to control the edge and can encourage unwanted burr formation.
WÜSTHOF likewise warns against excessive pressure when using sharpening equipment because it can remove more steel than necessary.
Step 8: Move to a Finer Grit
If your stone has two sides, turn it over after completing the coarse sharpening stage.
For example:
1000 grit → 3000 grit
The finer abrasive removes or refines the scratches created by the coarser stone.
You do not necessarily need to spend as much time on the finishing stone as on the coarse stone.
The objective has changed.
You are now refining the edge rather than rebuilding it.
Step 9: Deburr the Edge
Deburring is one of the most important—and most frequently overlooked—steps.
A knife can feel extremely sharp while still carrying a weak burr.
That burr may bend during cutting, producing inconsistent performance.
Use extremely light alternating strokes on the finishing stone.
The goal is not to create another large burr.
You want to minimize and remove the remaining weakened material at the apex.
Knife Steel Nerds’ controlled testing found that burrs can negatively affect measured sharpness, and that burrs may not always be obvious simply by feeling the edge or performing a basic paper test.
Step 10: Clean and Dry the Knife
After sharpening:
- Rinse the blade carefully.
- Remove abrasive residue.
- Dry the knife completely.
- Clean the stone according to its instructions.
- Allow the stone to dry appropriately.
Never put a wet carbon-steel knife away and assume it will be fine.
Moisture can encourage corrosion.
How to Test Your Newly Sharpened Knife
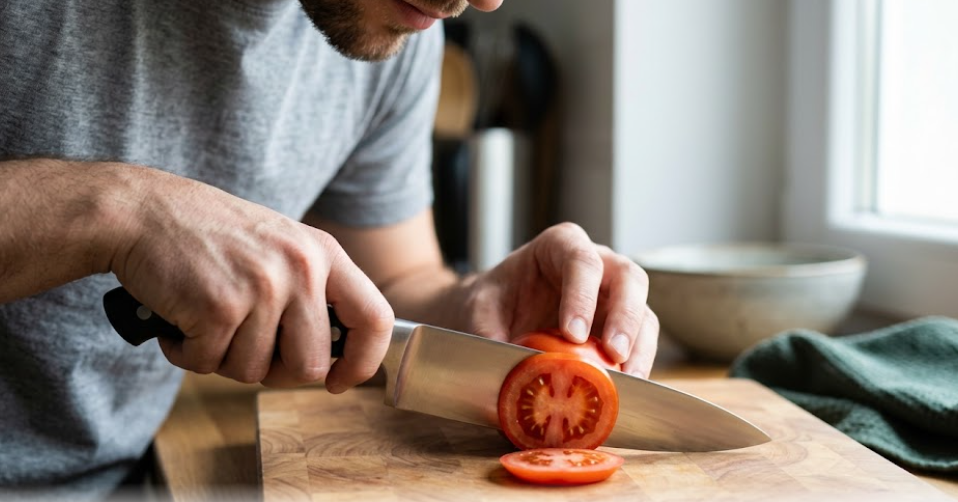
A dramatic shaving test is not necessary.
For kitchen knives, practical cutting tests are more useful.
Test 1: Paper
Hold a sheet of paper securely and carefully slice through it.
A properly sharpened knife should cut smoothly rather than snag repeatedly.
However, passing a paper test does not prove that the edge is perfect.
Test 2: Tomato
A tomato is an excellent kitchen test because its skin can be difficult for a dull knife to penetrate without pressure.
A sharp knife should initiate the cut with little force.
Test 3: Onion
Try making thin slices.
A good edge should enter the onion cleanly rather than crushing it.
Test 4: Food Preparation
Ultimately, this is the most important test.
Does the knife:
- Start cuts easily?
- Slice food cleanly?
- Require less force?
- Feel predictable?
- Maintain performance through normal cooking?
Real-world performance matters more than passing a novelty sharpness test.
Performance Review: What Actually Makes a Knife Perform Well?
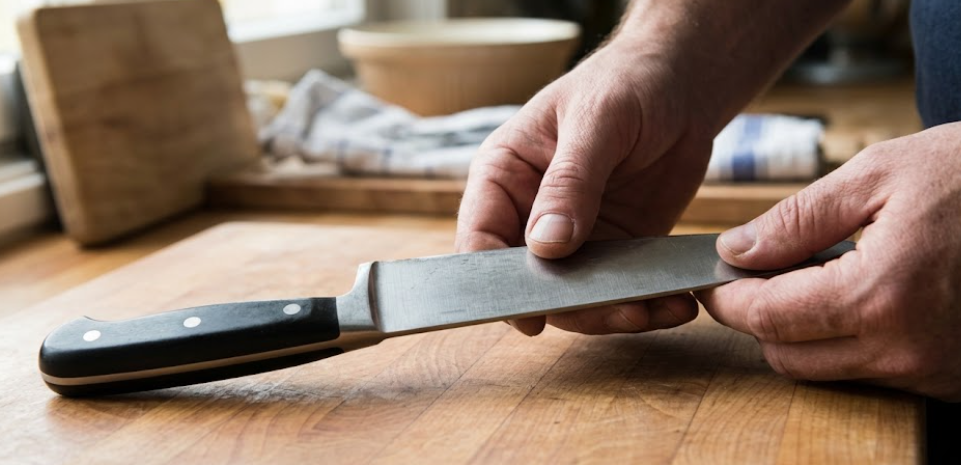
It is tempting to think that the highest grit automatically produces the best knife.
That is not necessarily true.
Knife performance is influenced by several variables.
1. Edge Angle
A more acute angle can improve cutting ability but may be more vulnerable to damage.
2. Steel
Different steels have different combinations of hardness, toughness, and wear resistance.
3. Edge Thickness
A thick blade behind the edge can feel less efficient even if the apex itself is extremely sharp.
4. Sharpening Quality
An inconsistent bevel or poorly removed burr can reduce performance.
5. Edge Finish
The ideal finish depends on the intended cutting task.
Knife Steel Nerds’ testing demonstrates why simplistic claims such as “higher grit always means better” are unreliable. Controlled experiments have shown meaningful effects from edge geometry and sharpening finish, with some slicing tests favoring relatively coarse finishes.
For everyday kitchen work, therefore, chasing an extremely polished edge is often unnecessary.
Grit Progression: Which Combination Should You Use?
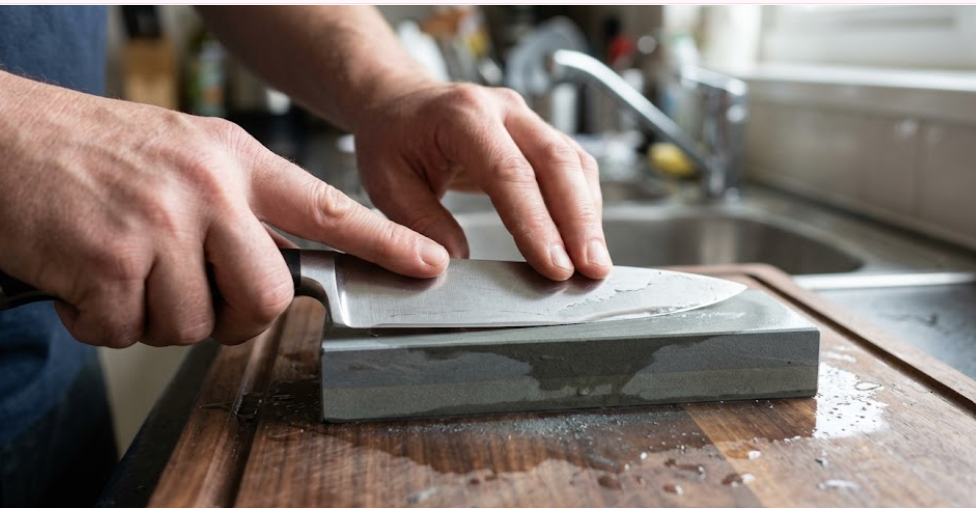
For a Slightly Dull Knife
Use:
1000 → 3000
This is an excellent general-purpose progression.
For a Very Dull Knife
Use:
400–600 → 1000 → 3000
The coarse stone establishes the edge.
The 1000-grit stone refines it.
The 3000-grit stone provides a smoother finish.
For a Severely Damaged Knife
Use:
200–400 → 800–1000 → 3000
But beginners should avoid unnecessarily coarse stones.
A coarse stone removes metal rapidly. If you use one without needing it, you can shorten the useful life of the knife.
Common Knife Sharpening Mistakes Beginners Make
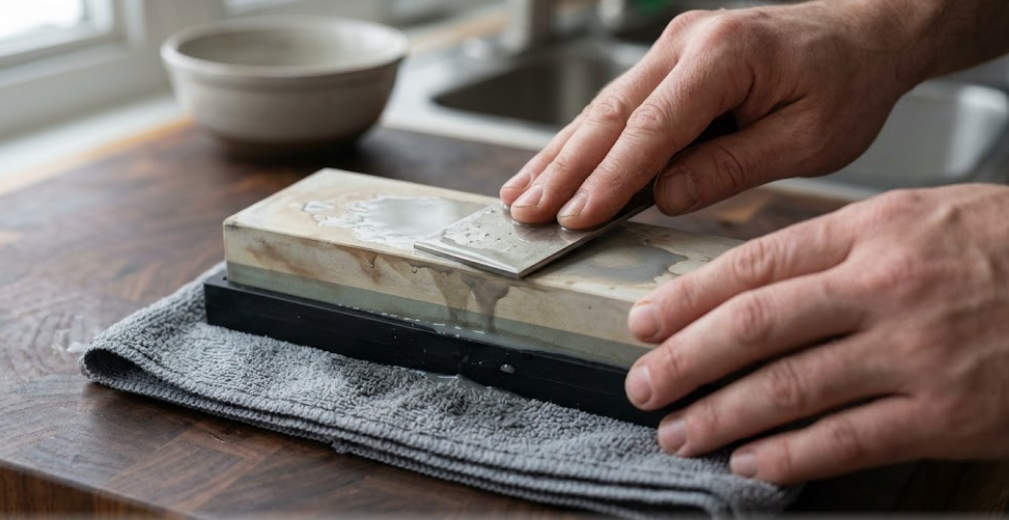
1. Changing the Angle Constantly
This is probably the biggest beginner mistake.
The blade may contact the stone correctly during one stroke and incorrectly during the next.
Solution: Slow down and prioritize consistency.
2. Using Too Much Pressure
Heavy pressure can make the knife difficult to control.
Solution: Use moderate pressure during initial sharpening and progressively lighter pressure as you refine the edge.
3. Sharpening Only the Middle
Beginners often produce a sharp center section while leaving the heel and tip dull.
Solution: Divide the blade mentally into sections and ensure every part receives attention.
4. Ignoring the Burr
Creating a burr does not automatically mean the knife is finished.
Solution: Treat burr management as a separate stage of sharpening.
5. Starting with an Extremely Fine Stone
A 6000- or 10,000-grit stone will not efficiently repair a severely dull edge.
Solution: Match the grit to the condition of the blade.
6. Using a Moving Stone
A sliding stone is both inconvenient and dangerous.
Solution: Use a stable stone holder or nonslip base.
7. Sharpening a Serrated Knife Like a Plain-Edge Knife
Serrated blades have individual teeth and require a different technique.
A flat whetstone is not the normal solution for sharpening the inside of each serration.
ZWILLING notes that serrated blades are an exception to its general guidance for conventional whetstone sharpening.
Infographic: Beginner Whetstone Sharpening Workflow
KNIFE DULL?
↓
Inspect the blade
↓
Choose grit
→ Slightly dull: 800–1200
→ Very dull: 400–800
→ Damaged/chipped: 200–400
↓
Secure the stone
↓
Set the correct angle
↓
Sharpen first side
↓
Raise a controlled burr
↓
Sharpen second side
↓
Reduce pressure
↓
Move to finer grit
↓
Deburr
↓
Clean + dry
↓
Test on food
↓
Record what worked
How Often Should You Sharpen a Kitchen Knife?
There is no universal sharpening schedule.
Frequency depends on:
- How often you cook
- What foods you cut
- Cutting-board material
- Knife steel
- Edge geometry
- Cutting technique
- Whether you use a honing or maintenance tool
A home cook who prepares food several times a week may need occasional sharpening, while a professional kitchen can require much more frequent maintenance.
The better strategy is to sharpen based on performance rather than an arbitrary calendar.
When the knife begins requiring noticeably more force, slipping through food, or crushing rather than slicing, it may be time for maintenance.
How to Make Your Whetstone Last Longer
Your stone is also a tool that needs maintenance.
Use the entire surface instead of repeatedly sharpening in exactly the same small area.
Some stones develop a hollow or uneven surface over time.
If that happens, the stone may need flattening.
WÜSTHOF specifically recommends using the entire surface of its whetstones and notes that a rubbing stone can be used when necessary to address an uneven surface.
Good Stone Maintenance Habits
- Use the correct lubricant.
- Avoid dropping the stone.
- Clean it after use.
- Allow it to dry according to the manufacturer’s instructions.
- Store it somewhere protected.
- Flatten it when required.
Safety Tips for Sharpening Knives
Sharpening involves a very sharp object, so basic precautions matter.
Always:
- Work on a stable surface.
- Keep your fingers away from the cutting edge.
- Control the knife rather than rushing.
- Keep children away from the work area.
- Wipe up excessive water around the counter.
- Store the knife safely after sharpening.
A sharp knife also deserves careful handling after sharpening. A newly sharpened edge can behave very differently from the dull edge you started with.
WÜSTHOF notes that dull knives can require greater force during cutting, reducing control; this is one reason proper edge maintenance matters.
Frequently Asked Questions About Sharpening with a Stone
1. What grit whetstone should a beginner buy?
A 1000-grit stone is one of the most practical starting points for ordinary kitchen knives. A combination 1000/3000 or 1000/4000 stone provides additional flexibility.
If your knife is severely damaged, you may need a coarse stone first.
2. How many strokes should I use on each side?
There is no universal number.
The condition of the knife, stone, steel, pressure, and technique all affect the required number of strokes.
Instead of blindly counting, monitor whether you are reaching the apex and developing a consistent burr.
3. Should a whetstone be completely submerged in water?
Not always.
Some stones require soaking, some require only surface wetting, and some are designed for other lubricants.
Always follow the stone manufacturer’s instructions.
4. What is the best angle for sharpening a kitchen knife?
It depends on the knife.
Many kitchen knives fall somewhere around 10–20° per side, but manufacturer recommendations should take priority. For example, WÜSTHOF specifies approximately 14° per side for its standard blades and 10° for certain Asian-style knives.
5. Why does my knife feel sharp but cut poorly?
Several things could be happening.
The most common possibilities include:
- A remaining burr
- Inconsistent edge geometry
- Excessive edge angle
- Uneven sharpening
- A thick blade behind the edge
- An unsuitable finishing technique
A knife can have a very sharp apex but still have poor overall cutting ability because cutting performance depends on more than apex sharpness alone.
6. Do I need a 10,000-grit stone?
Most home cooks do not.
A medium-fine progression such as 1000 → 3000 or 1000 → 4000 is usually enough for excellent everyday kitchen performance.
Higher grits are useful when you specifically want a highly refined finish.
7. Is sharpening a knife with a stone difficult?
It has a learning curve, but the fundamentals are straightforward.
The most important skills are:
- Maintaining a consistent angle
- Covering the entire edge
- Controlling pressure
- Understanding burr formation
- Removing the burr properly
With regular practice, the process becomes much more natural.
Key Takeaways
If you remember only a few points from this guide, remember these:
- Start with the right grit. Around 800–1200 is suitable for many routine sharpening jobs.
- Use the correct angle. Check the knife manufacturer’s recommendation whenever possible.
- Consistency beats speed. A stable angle is more important than fast strokes.
- Do not use excessive pressure.
- Sharpen the entire edge, including the heel and curved tip.
- Learn to recognize and manage the burr.
- Use finer grits for refinement, not for repairing badly damaged edges.
- Do not assume the highest grit produces the best practical edge.
- Keep your stone flat and maintained.
- Test the knife through real cutting tasks, not only novelty sharpness tests.
- Practice on an inexpensive kitchen knife before sharpening a valuable specialty blade.
Conclusion: Is a Whetstone Worth Learning?
For beginners, sharpening with a stone can initially feel slower and more complicated than using a pull-through sharpener. But the extra learning pays off through greater control.
A basic 800–1200 grit stone, a stable setup, the correct angle, controlled pressure, and careful burr management are enough to restore many ordinary kitchen knives.
The biggest mistake is treating sharpening as a race. It is a precision process.
Start slowly. Keep your angle consistent. Use only as much pressure as necessary. Pay attention to the burr rather than blindly counting strokes. Then refine the edge with a suitable finishing grit.
With those fundamentals in place, sharpening stops being a mysterious skill and becomes a repeatable maintenance routine.
For most home cooks, that is the real advantage of learning how to sharpen a knife with a stone: you gain control over the condition, geometry, and performance of your knives instead of simply replacing or repeatedly outsourcing the sharpening process.